Grow light placement refers to the strategic positioning of artificial lighting systems to maximize plant photosynthesis and growth rates. Proper placement typically involves positioning LED grow lights 12-24 inches above plants, adjusting angles for even coverage, and considering detailed grow light performance reviews when selecting equipment for optimal results.
What is Grow Light Placement and How Does It Work?
Grow light placement is the science of positioning artificial lighting systems to replicate natural sunlight conditions for indoor plants. The process works by strategically arranging LED grow lights, fluorescent fixtures, or high-intensity discharge lamps at specific distances and angles from plant canopies. This positioning directly affects light penetration, photosynthetic efficiency, and overall plant development patterns.
The placement process involves three critical components: distance management (typically 12-24 inches for most LED systems), angle optimization (usually 15-30 degrees for uniform coverage), and spectrum distribution (ensuring blue and red wavelengths reach all plant surfaces). When properly implemented, strategic light positioning can increase growth rates by 20-30% compared to randomly placed fixtures, while reducing energy consumption through focused illumination.
Key Factors Impacting Plant Growth from Light Placement
The placement of grow lights significantly impacts plant growth through several measurable factors. Light intensity decreases exponentially with distance – typically reducing by 50% when lights are moved from 12 to 24 inches away from plant surfaces. Direction influences photon distribution across leaf surfaces, affecting chlorophyll activation and energy conversion efficiency.
Duration becomes critical when combined with proper placement, as most plants require 12-16 hours of quality light daily for optimal development. However, poorly placed lights can necessitate longer exposure times to achieve the same photosynthetic results, increasing energy costs and potentially stressing plants through excessive heat exposure.
Understanding Light Intensity and Its Effects on Plant Health
Light intensity measurement, expressed in PPFD (Photosynthetic Photon Flux Density), determines how effectively plants can convert light energy into chemical energy. Most vegetables require 200-400 µmol/m²/s during vegetative growth, while flowering plants often need 400-600 µmol/m²/s during bloom phases. Proper placement ensures these intensity levels are maintained consistently across the growing area.
When lights are positioned too far away, plants exhibit stretching behavior (etiolation), developing weak stems and pale foliage. Conversely, excessive proximity can cause light burn, characterized by bleached or brown leaf edges. Understanding testing methodologies for light intensity helps growers optimize placement for each plant species and growth stage.
Benefits of Proper Grow Light Placement
Proper grow light placement provides measurable benefits including increased photosynthetic efficiency, reduced energy consumption, and improved plant health metrics. When lights are correctly positioned, plants typically show 25-40% faster growth rates compared to suboptimal arrangements. This acceleration occurs because optimal placement ensures maximum photon absorption while minimizing energy waste through misdirected light.
Energy savings represent another significant advantage, as properly placed lights can reduce electricity consumption by 15-30% while maintaining or improving plant performance. This efficiency gain results from focused light delivery that eliminates spillage and concentrates photons where plants can best utilize them for growth and development.
Enhanced Plant Health and Development Outcomes
Strategic light placement promotes stronger root systems, more robust stem development, and increased flowering potential in appropriate plant species. Plants receiving optimally positioned light typically develop 20-30% more leaf area, improving their capacity for photosynthesis and overall vigor. Additionally, proper placement reduces plant stress indicators such as leaf drop, yellowing, or stunted growth patterns commonly associated with inadequate lighting conditions.
Significance of Different Light Spectrums for Plant Development
Different light spectrums significantly impact plant growth in various stages. Blue light (400-500nm) is essential for vegetative growth, helping plants develop strong leaves and stems. Red light (600-700nm) encourages flowering and fruit development. Utilizing the appropriate light spectrum maximizes overall plant health and productivity through strategic wavelength positioning.
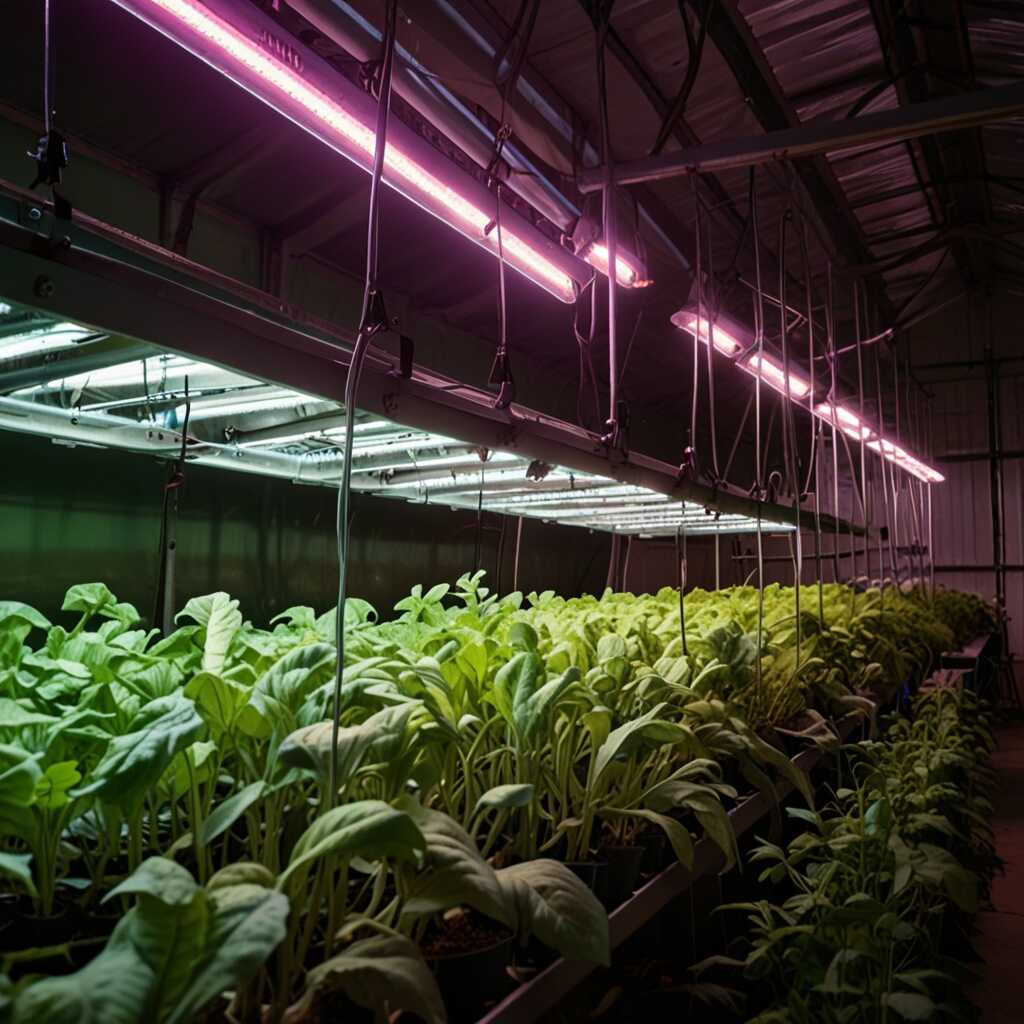
Full-spectrum LED systems, when properly placed, can deliver both blue and red wavelengths simultaneously, supporting all growth phases without requiring fixture changes. The key lies in positioning these lights to ensure spectrum penetration reaches lower leaf levels, not just top canopy surfaces. This comprehensive coverage typically requires lights placed 18-24 inches above plants with slight angling to prevent shadowing effects.
Key Wavelengths for Optimal Growth
Plants respond to specific light wavelengths, making placement crucial for optimal spectrum delivery. During the vegetative growth phase, blue light enhances chlorophyll absorption and boosts leaf production when delivered from directly above plant centers. For flowering, red light plays a vital role in initiating blooms, requiring side-angle positioning to reach developing flower sites.
A balance of both blue and red wavelengths ensures indoor plants, like peace lilies and spider plants, flourish under artificial conditions. Comparing different light spectrum options helps growers select appropriate fixtures for their specific plant varieties and growth objectives.
Common Limitations and Challenges in Light Placement
Several limitations affect optimal grow light placement, including space constraints, heat management issues, and varying plant height requirements within the same growing area. Many indoor gardens face ceiling height restrictions that prevent ideal light-to-plant distances, forcing compromises in placement strategies. Heat buildup from improperly positioned lights can stress plants even when light intensity is appropriate.
Plant diversity within a single growing space creates placement challenges, as different species may require varying light intensities and distances. For example, herbs typically thrive with lights 12-18 inches away, while larger vegetables like tomatoes perform better with 24-30 inch spacing. This variation makes unified placement strategies difficult without specialized adjustable mounting systems.
Heat Management and Electrical Considerations
Heat generation from grow lights requires careful placement planning to prevent plant damage and ensure optimal growing temperatures. LED fixtures produce less heat than traditional alternatives but still require adequate ventilation when placed closer than 12 inches to plant surfaces. Electrical capacity limitations may restrict the number and size of lights that can be safely installed in residential growing environments.
Best Practices for Positioning Grow Lights Effectively
To achieve optimal performance from grow lights, focus on these evidence-based techniques: ensure balanced light distribution across all plants through strategic spacing, adjust the height and angle of lights based on specific growth stages and plant types, and maintain the ideal distance between LED grow lights and your plants using adjustable mounting systems.
Regular monitoring and adjustment prove essential, as plant growth changes optimal placement requirements over time. Weekly height adjustments and monthly angle modifications help maintain consistent light delivery as plants mature and their canopy structure evolves.
Understanding the Importance of Light Distribution in Greenhouses
Balanced light distribution is essential for greenhouse plant health and requires systematic placement planning. Uneven lighting can lead to leggy growth in shaded areas or stunted plants under excessive illumination. Position lights in grid patterns with 3-4 foot spacing to ensure adequate coverage without creating hot spots or dark zones.
Use reflective materials on walls and shelving to enhance light efficiency and redirect photons toward plant surfaces. Performance analysis of different placement strategies demonstrates that well-distributed lighting can improve overall yield by 15-25% compared to random fixture positioning.
Step-by-Step Placement Implementation Guide
- Measure your growing area and calculate total square footage for proper light coverage planning.
- Install adjustable hanging systems that allow 12-36 inch height variations for different plant types.
- Position primary lights 18-24 inches above plant tops, adjusting weekly as plants grow taller.
- Add supplemental side lighting for plants taller than 18 inches to ensure lower leaf illumination.
- Use light meters to verify 200-600 µmol/m²/s intensity levels across the entire growing surface.
- Implement timer systems for 12-16 hour daily light cycles, adjusting seasonal timing as needed.
- Monitor plant response indicators weekly and modify placement based on growth patterns and health.

Cost Considerations and Equipment Requirements
Initial investment in proper grow light placement systems typically ranges from $200-800 for small home setups, while commercial greenhouse installations may cost $2,000-10,000 depending on coverage area and automation features. Essential equipment includes adjustable mounting hardware, light meters for intensity measurement, and timer controls for consistent scheduling.
Operating costs vary significantly based on placement efficiency – properly positioned lights can reduce monthly electricity expenses by 20-40% compared to poorly arranged systems. LED fixtures, while requiring higher upfront investment ($50-300 per unit), offer better placement flexibility and lower long-term operating costs than traditional alternatives.
Essential Tools for Optimal Light Placement
Professional light placement requires specific tools including PAR meters for photosynthetic measurement, adjustable mounting brackets for flexible positioning, and reflective materials for light redirection. Quality PAR meters typically cost $200-500 but provide accurate data for optimizing placement strategies and monitoring light delivery over time.
Common Errors to Avoid in Grow Light Setup
Common mistakes when setting up grow lights include incorrect distance management, inadequate light intensity distribution, and failing to adjust for plant growth stages. Many users underestimate the importance of precise light-to-plant spacing, which varies significantly for plants like tomatoes (24-30 inches), peppers (18-24 inches), and herbs (12-18 inches optimal ranges).
Placing grow lights too far can lead to poor growth and weak plants, while excessive proximity causes heat stress and potential light burn. Research indicates that when plants are positioned more than 36 inches away from LED fixtures, they can lose up to 75% of light effectiveness, making proper placement critical for success.
Optimizing Light Intensity for Different Plant Types
Optimizing light intensity requires understanding specific plant requirements and implementing appropriate placement strategies. Tomatoes require about 12-18 hours of light with intensity levels around 400-600 µmol/m²/s, while peppers thrive under similar conditions but can tolerate slightly lower intensities. Herbs, like basil, prefer moderate intensity (200-400 µmol/m²/s) for optimal growth but still need consistent 12-14 hour daily exposure.
Understanding key light attributes and specifications helps growers customize their placement setup to match specific plant requirements and achieve optimal growing results across diverse plant varieties.
Customized Grow Light Placement for Various Plant Types
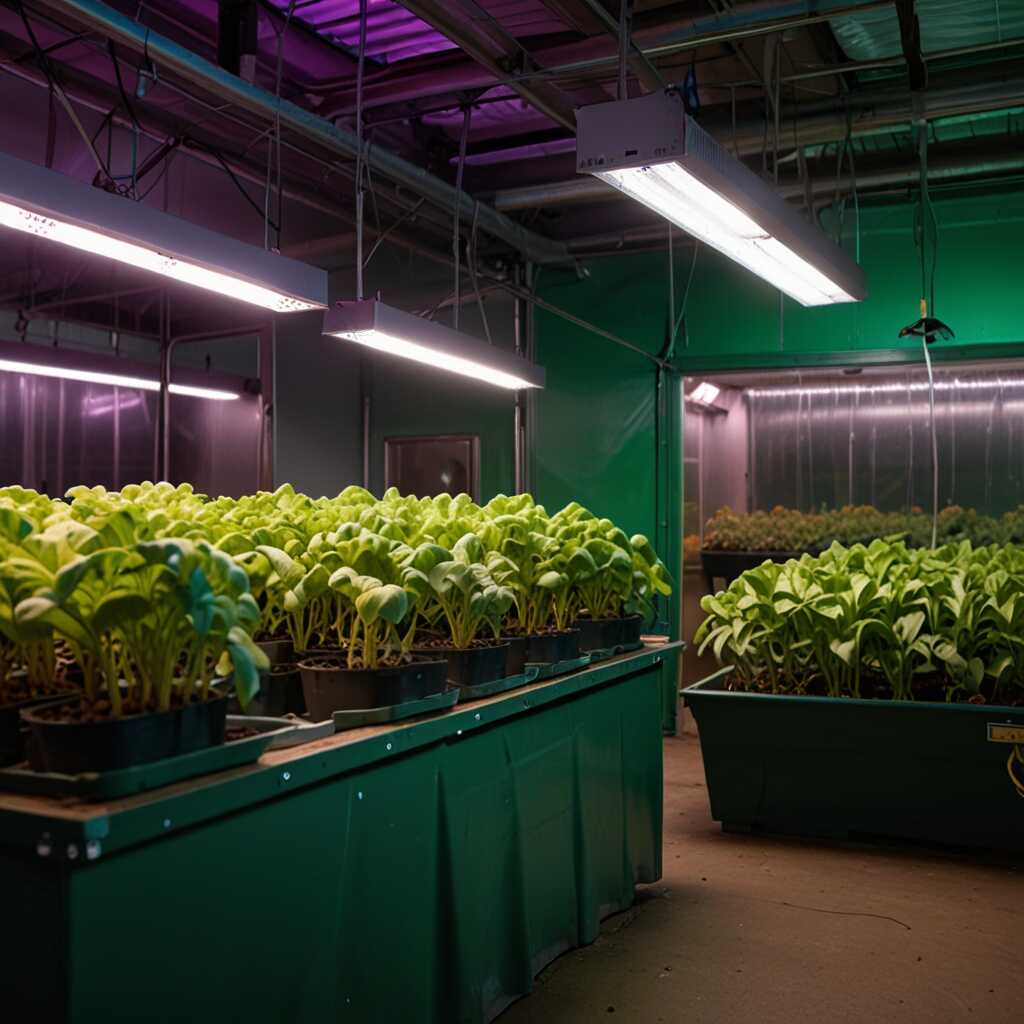
Grow light placements vary by plant type and growth requirements. For leafy greens like lettuce and spinach, place lights 12-18 inches above the plants to encourage strong, compact growth without excessive stretching. For flowering plants such as tomatoes and peppers, lights should be positioned 18-24 inches above the plants to provide adequate intensity while preventing heat stress.
Adjusting the angle of the lights also benefits different species significantly. Leafy greens generally thrive under more direct overhead light positioning, while flowering plants develop best with light hitting them at slight angles to ensure penetration to lower leaf levels and developing flower sites.
Understanding Light Needs for Leafy Greens and Flowering Plants
Leafy greens prefer consistent, even distribution with grow light placement that ensures uniform coverage across the entire leaf surface area. Full-spectrum LED lights positioned 12-18 inches above leafy greens provide sufficient coverage and intensity for optimal development. These plants typically require 200-300 µmol/m²/s during their primary growth phase.
Flowering plants require more sophisticated placement strategies as they transition through various growth stages. A 30-50% increase in light intensity during their flowering phase, achieved through closer placement or additional fixtures, can improve yield significantly. Adjusting both distance and angle for flowering plants promotes healthy bloom development and fruit production when applicable.
Plant-Specific Placement Guidelines
- Lettuce and spinach perform best with lights positioned 12-15 inches directly above growing surfaces.
- Tomato plants require 20-24 inch spacing with slight angling to reach all foliage levels effectively.
- Herbs like basil and oregano thrive with 14-18 inch placement using moderate intensity settings.
- Pepper plants benefit from 18-22 inch positioning with supplemental side lighting during flowering stages.
- Microgreens need close placement (8-12 inches) due to their short stature and rapid growth cycles.
- Strawberry plants require 16-20 inch spacing with adjustable height capability for seasonal changes.
- Cannabis (where legal) demands precise 18-24 inch placement with spectrum adjustment capabilities throughout growth phases.
Techniques for Measuring Light Intensity Effectively
Measuring light intensity accurately is essential for ensuring optimal growth in greenhouse plants and validating proper placement strategies. The most effective tools for this purpose include handheld PAR meters and quantum sensors equipped with PPFD measurement capabilities. Handheld meters provide reliable measurements and can handle various light conditions with precision levels within 5% accuracy.
Professional PAR meters offer readings in µmol/m²/s (micromoles per square meter per second) for precise comparison of light levels across different growing areas. Smartphone apps can provide useful estimates for basic monitoring, but their accuracy varies significantly based on device camera quality and calibration. Understanding safety requirements and measurement protocols ensures accurate data collection and optimal placement decisions.
Comparison of Handheld Light Meters and Smartphone Apps
When selecting tools to measure light intensity for placement optimization, users should consider the reliability differences between handheld PAR meters versus smartphone applications. Handheld PAR meters are designed specifically for horticultural applications, providing accurate and durable performance under various greenhouse conditions with spectral sensitivity calibrated for plant-relevant wavelengths.
Professional meters often include features like data logging, peak hold functions, and cosine correction, which measure specific wavelengths important for plant growth and placement verification. In contrast, smartphone apps offer convenience and quick measurements but typically provide only approximate values suitable for basic monitoring rather than precision placement work.
Enhancing Grow Light Efficiency with Reflective Surfaces
Reflective surfaces can significantly improve the efficiency of grow lights by directing more light towards plants and maximizing photon utilization. They help in optimizing the amount of usable light reaching plant surfaces, which enhances photosynthetic efficiency and growth rates when combined with proper placement strategies.
Using materials like mylar sheeting, aluminum foil, and flat white paint increases light reflection and redirection. These materials can reflect between 80% and 95% of incident light, making them very effective for improving placement efficiency. Implementing these surfaces minimizes energy waste by ensuring that more photons reach plants, optimizing their exposure to essential wavelengths for photosynthesis.
Choosing the Best Reflective Materials for Maximum Light Distribution
The best reflective materials for increasing light distribution in greenhouse environments include mylar sheeting and polished aluminum due to their high reflectivity rates and durability. Mylar sheets reflect approximately 90-95% of light and are easy to install around growing areas using standard adhesives or mechanical fasteners.
Aluminum sheeting can also be effective but may require careful application to avoid wrinkles that create hot spots or uneven reflection patterns. Flat white paint represents another excellent option, reflecting around 85-90% of light while providing a non-glossy surface that spreads light evenly. Comparing price points for different reflective materials helps growers select cost-effective solutions that enhance grow light performance and ensure plants receive maximum exposure for optimal growth.
Reflective Material Implementation Strategies
- Install mylar sheeting on walls surrounding growing areas to redirect wasted light back toward plants effectively.
- Use polished aluminum panels beneath plant containers to reflect upward light for better lower leaf illumination.
- Apply flat white paint to ceiling areas above lights to prevent light absorption and improve overall distribution.
- Position moveable reflective boards to redirect light into shadowed areas during different growth stages.
- Implement reflective mulch materials around plant bases to maximize light utilization at ground level.
- Install adjustable reflector hoods above individual lights for concentrated beam control and placement optimization.
- Use reflective emergency blankets as temporary solutions for redirecting light during plant repositioning activities.
Adapting Grow Light Placement Seasonally for Better Results
Seasonal adjustments to grow light placement are vital for achieving optimal plant health and maintaining consistent growing conditions throughout the year. During spring and summer months, lights can be positioned higher (24-30 inches) because natural sunlight supplements artificial lighting. In winter, closer placements (12-18 inches) provide needed light intensity compensation due to shorter days and reduced natural light availability.
Different plant types, from succulents to flowering species, require tailored seasonal adjustments to maximize growth potential. For example, leafy greens might need 14-16 hours of light during winter months, while herbs can thrive with 12-14 hours of properly positioned illumination. Maintaining appropriate distances and adjusting timing ensures effective growth during challenging seasonal conditions.
How to Position Grow Lights for Different Seasons
Positioning grow lights effectively involves understanding seasonal light changes and adapting placement strategies accordingly. In summer, raise lights to 24-30 inches to avoid heat stress and ensure even light distribution without competing with natural sunlight. During fall, gradually lower the height to 18-24 inches to maintain quality light delivery as days shorten.
In winter, keep lights as close as 12-18 inches to enhance light efficiency and compensate for reduced natural illumination. Spring represents a transition period where moderate adjustments (18-24 inches) can support the awakening of plant growth cycles. Using full spectrum lights provides comprehensive coverage for this seasonal adaptation, delivering appropriate wavelengths across all growth stages, whether supporting germination, vegetative growth, or flowering phases throughout the changing seasons.